Getting things setup requires only some rudimentary wiring skills
What you will need:
- C5 data module and 4 wire c5data module lead (your module shipped with this)
- Some heat shrink and a soldering iron
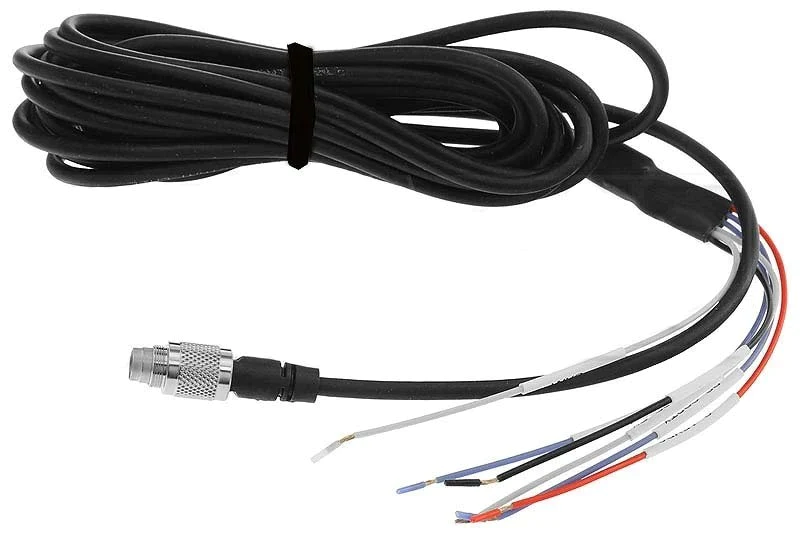
- The pigtail 7-pin solo2dl cable (Pictured below)
- A copy of the C5data sample solo cofig
- (Optional) the C5Data custom canbus library
- A copy of race studio 3 installed on your PC (and verified access to your solo2dl)

Wiring the C5 data bridge
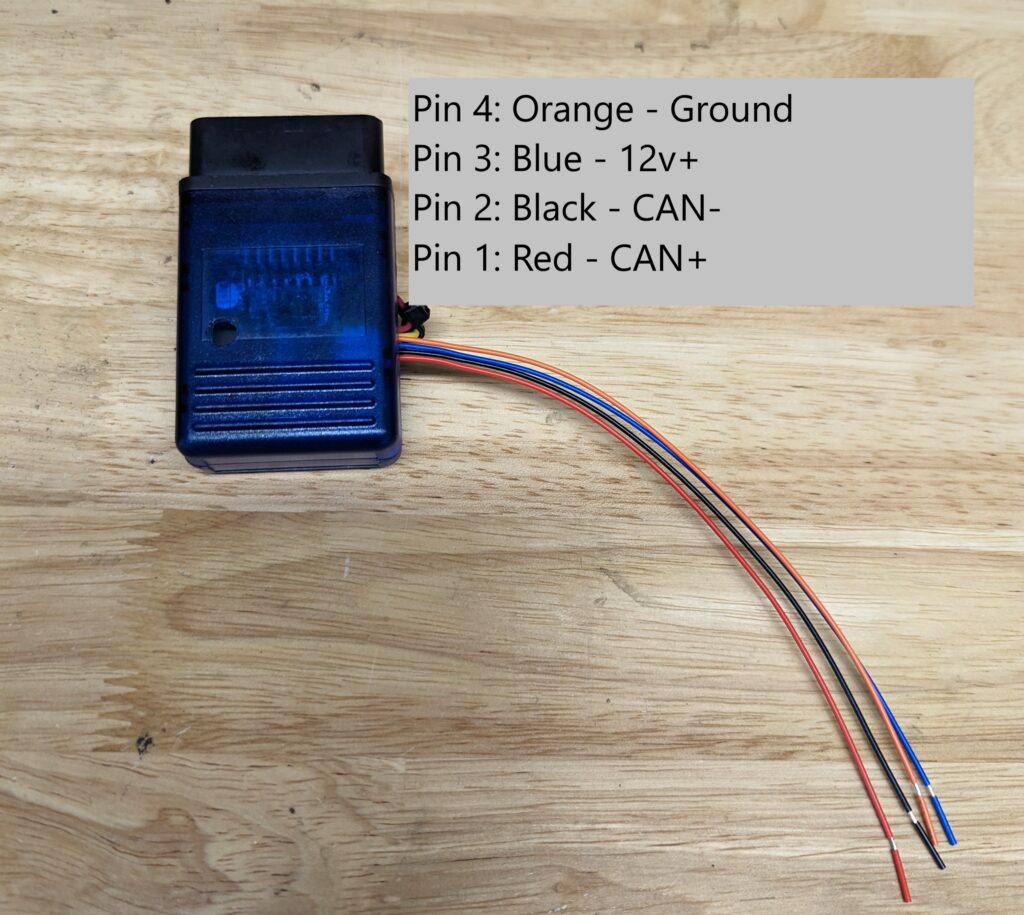
The flying lead from the C5Data module should be wired to the following pins on the AIM pigtail. These are the only pins we will be using and the rest can be safely covered and will not be used.
You should disconnect the lead from the data module before soldering and heat shrinking the joints.

Only those 4 wires will be used in this solution, the rest should be capped safely on the AIM harness.
All of these wires go to the AIM solo2 harness DO NOT ATTACH THE 12v+ WIRE TO VOLTAGE FROM THE CAR this is the feed to power your solo. The data bridge will control power to your solo for you..
!!!! Do not plug this in until all bare wire is covered with heat shrink and/or tape. Shorting the power / ground will result in permanent damage to the board. If you aren’t comfortable with this, please avail yourself of our pre-made harness to avoid damaging your data module !!!
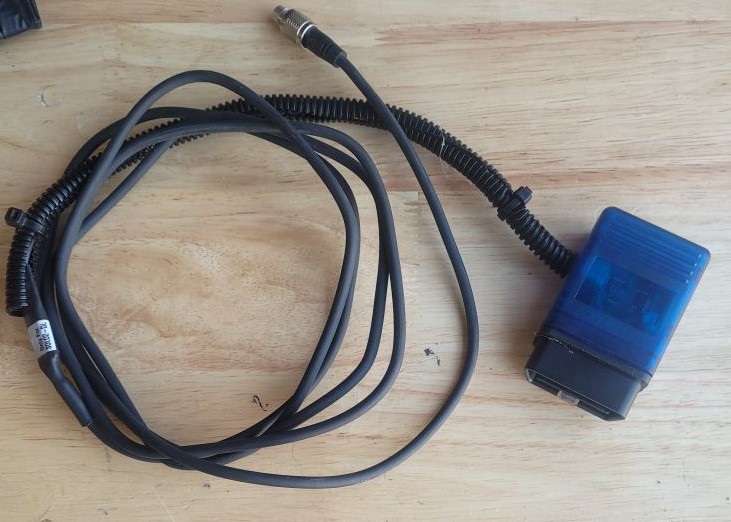
The end result you will end up with will look like this (split flex optional but recommended to protect the wires):

Setting up your AIM device
You will load Race Studio and need to download 2 files:
First you will need the CANBUS library that you will import into race studio
Iris Systems J1850 Bridge Canbus LibThis is a sample configuration for a SOLO2DL you may use this as is, or use it as a jumping off point
For Solo2DL V1 hardware you will want:
C5Data Solo2 V1 ConfigFor Solo2DL V2 hardware you will want:
C5Data Solo2 V2 ConfigOnce both files are downloaded, open race studio navigate to the protocols tab, select AIM protocol file and import the canbus library.

Once successful you will see the CANBUS library

Next navigate to configurations and import the zconfig file and you will see the config appear:

The final step is simply connect to your own solo2dl via WIFI and push this config to it.
You will see there are a number of pre-configured pages on this solo config but you are of course free to customize.
- Page1: Time Attack – Just Predictive laptiime is displayed, all parameters are logged as usual
- Page2: Aux guages – This is designed as supplementary guages to be used when street driving or doing diagnostics
- Page3: Race Predictive laptime, +/- pace and coolant temp
Now connecting the C5 Data module to your car and the 7 pin connection to your solo just as you would normally and like magic all your cars data will be logged
If the solo powers up and is charging but data does not start feeding you may need to re-import the CANBUS lib to the solo2 config so follow the below steps
- Open your Solo2DL config in Race Studio 3
- Select ECU Stream
- Change ECU and select “Iris Systems” > “J1850 Bridge”
- When it asks you if you want to keep names of channels, select NO
- Save and upload the config again to your Solo2DL.
